Saturday, February 26, 2022

Wizardry: Pyrrhic Victory

Well hello there, long time no see.  As has become customary for this blog, I'm back from a lengthy hiatus.  I've had lots of things going on over the past year, not least of which being the complete breakdown of my marriage.  That's behind me now, but I have other things going on that limit my time for blogging and playing games.  The blog may continue, but I'll tackle that below.  For now, it's time to wrap things up with the long-awaited (by some) conclusion to Wizardry.

My last update saw me in something of a sorry state: my primary party had been ambushed and killed by Werdna, leaving their bodies effectively irretrievable.  I was now forced to revert to my all-evil back-up party, consisting of:

  • Faker, a 13th-level fighter
  • Fraudo, a 13th-level fighter
  • Satanic Stan, a 13th-level priest
  • Pagan Pete, a 13th-level priest
  • Spelric, a 13th-level mage
  • Magical Gary, a 13th-level mage

The first thing I noticed on reviewing my characters was that Satanic Stan had really good stats: he had an 18 in everything except IQ and Agility, and those were both sitting on 16.  By this point I'd looked at the requirements for the various specialty classes, and I knew that becoming a Ninja required scores of 17 across the board.  I was pretty stoked at the prospect of getting a Ninja in my party, so I dropped everyone except Stan and Fraudo and went down to grind against Murphy's Ghosts.  Levelling up was pretty quick with only two party members, and fortune was with me: the first level I gained got me the stats I needed, and I was able to convert Satanic Stan into a Ninja.  Now I had a front-line fighter with the ability to occasionally score an instant kill, as well as the ability to cast the highest-level priest spells.

I was determined not to be done in by Werdna a second time, so I set about trying to create the most powerful party I could muster.  I turned Faker and Fraudo into mages, so that my back-line spellcasters would have plenty of hit points.  I turned Spelric into a priest, and I turned Pagan Pete and Magical Gary into fighters.  After 13 more levels of grinding, I was all set to have four top level mages and three top-level priests, and a more robust party overall in terms of hit points.

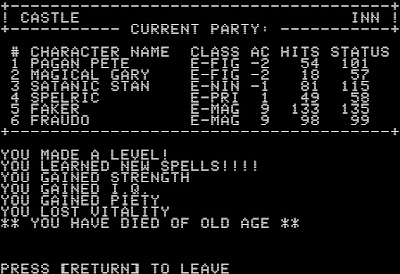
Of course, this being Wizardry, the game did its best to throw a wrench into my plans.  At around the point where my characters hit 8th level, something terrible happened to Fraudo: he died of old age!  I checked his age, and he was only 28.  Adventuring can be a stressful occupation, I guess.  A character who dies of old age can't be brought back to life, so I had to replace him with another mage who I called Vonotar.  I was getting tired of grinding, so I didn't bother giving Vonotar a second class; he was a straight mage, and the obvious weak link in my party in terms of hit points.

Heading down to level 10, I absolutely steamrolled my way to Werdna's lair.  With the amount of magic power I had I wasn't at all worried about conserving my spells, and everything I encountered fell easily beneath a barrage of MADALTOs and other high-level offensive magic.  I reached Werdna with a full array of 6th and 7th level spells, a party at full health, and the grim determination to get the bastard for good this time.

Of course, you know what happened next.  That dirty, lowdown motherfucker and his vampire cronies surprised me yet again.
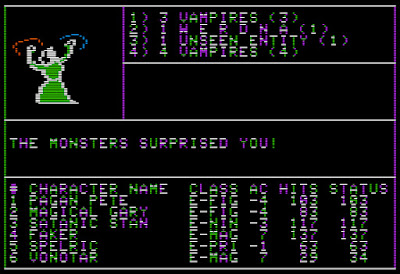

Vonotar and Spelric died almost instantly, and a bunch of my other characters were level-drained repeatedly.  On the second round I unloaded with TILTOWAITs, which were all shrugged off, and a couple more of my characters were killed (I can't remember who, this happened a couple of weeks ago at time of writing; I think Satanic Stan and Faker were my last characters alive).  I was left with just two characters, neither of whom were going to last another round.

As I had last time, I seriously considered having Stan cast LOKTOFEIT, which had a chance of whisking my party back to the safety of the castle.  It also had the chance of not working at all, but getting out of there was really tempting; if this party died, I was going to have to start all over again.  In the end, I decided that having my party die after their escape spell fizzled out was a really weak way to go, so I opted to fight it out.  If they were going to go, I was going to risk it all.

I already knew from my last party that MALIKTO wouldn't work, so I had my priest cast BADI (a death spell) on Werdna.  Whatever happened, I was planning to take him with me.

For my mage, I'd already ruled out TILTOWAIT, and I figured that any other damage-dealing spell would be insufficient.  I decided to take a gamble on the unknown, and cast MAHAMAN.  It's a 7th-level mage spell whose effects are random, and not given in the manual.  Just casting it drains a level from the caster, so I figured it must be good.  The manual says that it should only be used when there's no other hope for survival, and that summed up my situation pretty well.

I never found out if BADI was able to kill Werdna, because my mage cast MAHAMAN first, and it worked even better than I expected: it killed Werdna and his vampires immediately.  With one spell, cast in desperation, I'd beaten Werdna and got my revenge.  On his body I found an Amulet.  Apparently you can use it to get back to the surface, but I got back by casting MALOR instead.

I later looked up the effects of MAHAMAN, and saw that it can do the following: make your spells deal more damage; cure the party of all status ailments; fully heal the party; improve everyone's AC by 20; raise all dead characters; silence all enemies; or teleport all enemies away.  None of those are instant kills, so I guess I got the "teleport away" effect.  I'm just going to assume that I teleported Werdna into solid rock, and that he's not still lurking out there somewhere waiting to get his revenge.

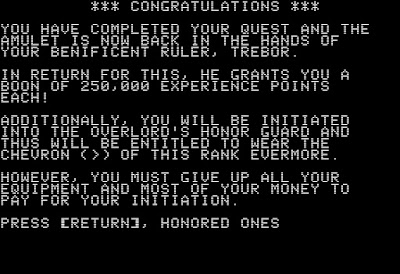
Upon returning to the castle I returned the Amulet to Trebor, and was rewarded with 250,000 experience points.  (This kind of thing always seems weird to me.  If Trebor can just hand out XP, why didn't he use that power to make a party of super-characters to go and kick Werdna's butt?)  I was also initiated into the Overlord's Honor Guard, at the cost of all my equipment and most of my gold.  Of course you get no choice about this; given the option my evil characters would have told Trebor where to stick his Honor Guard, and made off with their gold.  But alas, I must be somewhat depowered for Wizardry II, I assume.

I was able to resurrect all of my dead characters at the temple, so I'm ready for the sequel (about 18 games away on my list).  That said, I don't really feel like I properly finished Wizardry 1.  I know I didn't cheat, but getting lucky with a randomised spell still feels like a cheap victory.  I'll take it, because I really don't want to play this game again right now, but I don't feel all that good about it.

That sentiment kind of encapsulates my feelings on Wizardry, to be honest.  I'm glad to have played it and checked it off my bucket list, but ultimately I found it more frustrating that enjoyable.  There's no denying that it's very well made for the time; indeed, it's so far ahead of its time that games using the same basic design were being made for decades afterwards.  It's specific brand of cruelty, with perma-death and various other nasty surprises (I'm looking at you death from old age), mean that it's not a game that I'm ever going to love.  I've played plenty of other games with perma-death for the blog, but for some reason it irked me in Wizardry more than it has in the past.  Perhaps I just feel like I should be past that sort of thing by now?

Anyway, regardless of my own personal tastes I still expect it do well on the RADNESS Index.

RADNESS INDEX:

Story & Setting: We're not breaking any new ground here with the plot: an evil wizard has stolen a thing, and you have to kill him and get it back.  As for the setting, it really makes little sense.  I can just about buy that King Trebor has a monster-filled dungeon under his castle that he uses to test adventurers.  But why is the evil wizard Werdna living down there as well?  As an excuse for a dungeon adventure it works well enough, but it doesn't stand up to scrutiny.  The dungeons themselves are also unfortunately lacking in detail, with levels 5 through 9 being almost entirely pointless.  Rating: 2 out of 7.

Characters & Monsters: NPCs are virtually nonexistent, but Wizardry presents a number and variety of monsters that are far and away beyond anything else the blog has seen thus far.  Many of them are drawn from, or at least vaguely based on, monsters from AD&D, and their respective strengths, weaknesses and special abilities are well represented.  Most of the games I've played so far have either had a small number of foes with varied abilities, or a large number that function as little more than bags of hit points.  Wizardry may be the first game which has a similar variety in monster types and their abilities. Rating: 5 out of 7.

Combat: As I mentioned above, Wizardry is mechanically ahead of its time, and much of that comes down to the combat system.  Many RPGs to come will lift it wholesale, and its influence will even cross over to Japan in the Dragon Quest and Final Fantasy games.  Of course it feels primitive by today's standards, but it's not a bad stab at recreating early D&D combat played without miniatures (or "theatre of the mind" as it's sometimes called).  What really elevates it is the magic system, and its interaction with the strengths and weaknesses of the monsters.  This might be the first CRPG with combat that's actually fun to play, so it's no surprise that it gets copied so much.  Rating: 5 out of 7.

(From here I'm writing in February of 2022, so my memory gets hazier.  Forgive me for any inconsistencies and errors.)

Aesthetics: The look of Wizardry can best be described as utilitarian.  It's so utilitarian that Sir-Tech left it mostly intact for most of the decade, and countless other games lifted its basic layout.  There's some added flash with the various monster illustrations, but those get repetitive after a time, and are quite primitive to begin with.  I wavered with this one, but in the end I'm going to be stingy here. Rating: 2 out of 7.

Mechanics: For the most part everything in this game works very well, except that routine tasks tend to require two more steps than seem necessary.  The combat is the crowning achievement here, but I've already covered that above.  Aside from that exploration, character creation, the magic system and making transactions in town work well aside from minor niggles.  Everything takes longer than it should, but everything works like it should, and in a game of this vintage that counts for a lot. Rating: 4 out of 7.

Challenge: This is a tough one to judge.  It's not a long game, and for the most part it's not that difficult as long as you're careful. But the things thrown into the game to make it more difficult are incredibly frustrating: perma-death, death from old age, characters disintegrating during resurrection, teleporting into solid rock...  All of these things are included to more accurately model the D&D experience, but they all add up to make for an incredibly frustrating experience.  On the other hand, figuring out combat and when to deploy your spells and when to retreat from the dungeon is an enjoyable challenge.  So how do I judge a game that's hard in a way that is equal parts fun and frustration?  As I often do in these situations, I'll take the coward's way out. Rating: 4 out of 7.

Fun: The fun factor for Wizardry definitely operates on a curve: difficult and frustrating at the beginning, fun for a while in the middle, then lots of grinding and intense frustration again towards the end.  Thinking back on it, the frustrating parts outweighed the enjoyable ones, so I'm marking this one lower than its historical significance and longevity would suggest. Rating: 3 out of 7.

Bonus Points: 2.  As one of the most influential games in the CRPG genre and gaming in general, I have to give this one full points here.

The above scores total 25, which doubled gives a score of 50.  Add the two bonus points, and Wizardry scores a healthy RADNESS Index of 52.  That places it equal 3rd overall.  Only Zork and Ultima are higher, and Rogue is sitting on equal points.  It's interesting to see that it scored the same as Rogue, as they're similarly influential games with frustratingly difficult elements.  Nevertheless, despite its problems Wizardry is undoubtedly and unsurprisingly one of the very best games I've played for the blog so far.

STATE OF THE BLOG

Okay, so where do I go from here?   The sad truth is that I don't have time to maintain the blog on a regular basis.  I also don't get a lot of time to play games, and I don't want to devote all of that time to vintage games of often questionable qualitative value.  That said, I'm reluctant to abandon the blog completely; I'm not gonna lie, I like having readers and getting feedback, as small as my audience is.  So my current plan is to keep playing and posting occasionally.  I suspect that I'll be following my Priority List, so rather than a comprehensive journey through CRPGs and adventure games the blog will become a chronological journey through the best of the two genres.  I won't guarantee any sort of schedule, but I'll be back here intermittently.  What I'm saying is, if you're in the habit of checking here every day or every week, maybe scale back to once a month or so. It'll save some time

Sunday, September 5, 2021

Wizardry: Level 10

When I left off at the end of my last post, I was ready to tackle dungeon level 10, and take on the evil wizard Werdna.  My last attempt at that had ended somewhat disastrously, when a surprise attack left my entire party dead.  But I sucked it up, developed a whole new party, retrieved the bodies of my original guys and brought them all back to life.  I was in a pretty good spot, with a dozen characters sitting on level 13.  I couldn't mix and match them because of alignment constraints, but it felt reassuring to know that I had some ready-made back-ups.

My trip down to level 10 via the elevators was uneventful, and on level 9 I only had to fight a trio of 10th-level Fighters (easily dealt with) before dropping down the chute to level 10.  Exploring the initial area of level 10 I was attacked by a group of Murphy's Ghosts, which I found somewhat amusing considering that I'd spent the bulk of my time with this game killing these guys by the hundreds.  I stumbled into a teleporter that took me all the way back to the castle, which brought a wry smile to my face.  Not so long ago I'd been trapped in this area, desperately trying to resurrect my mages so that I could teleport to the surface.  I'd even reduced one of my mages to ashes during that whole saga, when all I'd needed to do was take two steps to the right and I'd have been safe.  You can't beat hindsight, I guess.

I started at 1. The Ts are teleporters,
with red being the origin point and
blue the destination.  TC goes back
to the castle.

Again I made my way back to chute on level 9, fighting a 10th-level Mage along the way.  I fought a pair of mages on level 10, trusting my melee fighters to take care of them before they could get off anything too damaging.  After that I discovered the teleporter to the next area.

Right next to the elevator was a message from Werdna: "One group of guardians ye have beaten but many more await ye! Turn back while you still can, mortals!"  Aside from being irritated by his inconsistent use of ye/you, I was also quite discouraged to see that I had "many more" fights ahead of me.  I was hoping this level would be small, and that I'd get to Werdna in short order.  That was not to be.

A winding corridor led to another room, where I was attacked by three groups of spellcasters: 1 High Wizard, 1 Arch-Mage, and 5 Bishops.  That was a lot of potential spell power, so I dropped them with a MALIKTO (a 7th-level Priest spell that causes 12-72 damage to all foes).  This wiped them all out, and I was able to step into the teleporter to the third area.

Level 10, Area 2. T3 leads
back to the beginning of
the level.

Area three started with another winding corridor, ending in a room.  (That's the pattern for all of the separate areas on level 10: a corridor ending in a room, with an unavoidable fight when you enter.) I was attacked by five Bishops, a High Wizard, and two "strange animals", who surprised me and got a free round of attacks.  I suspect the "strange animals" where Chimeras; they both hit me with their breath weapons, causing a decent amount of damage.  Luckily the Bishops didn't cast anything too devastating, and the High Wizard opted for a melee attack.  I wiped them out with another MALIKTO when my turn came around.

Exploring the room, I stumbled into the wrong teleporter and was taken back to the beginning of the first area.  It's not an enormous inconvenience because it doesn't take long to traverse through the level, but I did have a couple of fights along the way.  One was with a pair of Will-o-Wisps, which I found surprisingly hard to kill in melee.  They didn't pose much of a threat in return, but my fighters really struggled to hit them.  I ended up hitting them with two MABADI spells, which reduce a foe to only having 1-8 hit points left; that way, my next melee hit was guaranteed to kill them.  I also got attacked by a pair of Fire Giants, three Monks, and a Lesser Demon; three MADALTO spells took care of them.

Level 10, Area 3

In the fourth area I had to fight five Arch-Mages, one "strange animal" and one Chimera.  I hit the Arch-Mages with a MADALTO, focused my melee fighters on the Chimera, and killed the "strange animal" with BADI (a death spell that affects a single target).

Level 10, Area 4

In the fifth area, I had to battle two groups of high-level Fighters.  Fighters are never much of a problem in Wizardry, so I killed them with some mid-level damage spells (MADALTOs and LAHALITOs).

Level 10, Area 5

In area six I had another laughable encounter with Murphy's Ghosts.  It's almost like a reunion with old friends, because at this point they pose no threat whatsoever.  I also had to fight a Gorgon and 2 Chimeras.  I had to use lower-level DALTO spells, and a priest's LITOKAN (flame tower), because by this point my MADALTOs had been exhausted and I was saving my big guns for the final battle.

Level 10, Area 6

By the seventh area my characters were hurting, so I stopped to heal everyone back up to full.  My instincts were good here, because no sooner did I leave camp than I saw the following sign: "Lair of the evil wizard Werdna. The wizard is **IN**"  This was it, the final battle with Werdna.  I'd depleted a lot of my mid-level spells, but I was fully healed, and still in possession of most of my 7th-level arsenal, including the ability to drop multiple TILTOWAIT spells.  I was ready to mess Werdna up.

Level 10, Area 7.  The sign is at 3,
and Werdna is at 4.

As soon as I kicked through the door I encountered Werdna, accompanied by four Vampires and a Vampire Lord.  Despite me being well prepared, they got the drop on me with a surprise attack.  They hit me with a barrage of spells and attacks, and by the end of the first round Penitent Pat, Merlin and Flanker were all dead.  That was half of my party and three-quarters of my spell-casters, and the survivors were in bad shape.

My remaining spellcaster was Pious Pete, a priest.  I spent a long time deliberating over what to do.  I considered casting LOKTOFEIT, a spell that whisks the party back to the castle at the cost of all their equipment and most of their gold.  What stopped me was the note in the manual that this spell doesn't always work; I didn't want to try something that had a chance of just fizzling out.  Instead, I decided to hit the enemy with MALIKTO, hoping the damage would be enough.

Halfway through getting wrecked by Werdna.

It wasn't.  Werdna took some hits, but the Vampires all shrugged it off (even though the manual says that "none can escape or minimize its effects").  They wiped me out in the second round, and that was it for my first proper crack at killing Werdna.

Fortunately, I still had my party of evil characters as back-up, but there'd be no retrieving the bodies of my dead party this time.  They were now lying in Werdna's chamber, and I'd have to beat that fight in order to retrieve them all.  Not just that, but I'd have to beat Werdna with a party of less then six characters if I wanted to add dead bodies to my party.  That seemed unlikely, so unless Werdna disappears from the game permanently once killed, I was pretty sure that I'd seen the last of Mean Joe and company.

I have to say, at this point I was getting mighty sick of Wizardry and its specific brand of cruelty.  I think it's actually very well balanced, except for one thing: the surprise mechanic.  It's annoying to get wiped out by enemies without a chance to retaliate, and it's especially galling when it happens against the final foe in the game.  The last fight in a game should definitely be challenging, but it would be nice to have some semblance of chance at victory.  As it was I got surprised, my spellcasters got killed, and the best spell I had at my disposal was one the enemy was immune to.

Ah well, at least I had a better idea of what to expect next time, and was able to prepare for the rematch. My posting is several weeks behind my playing, so I've already taken on Werdna with my evil crew.  I'll try to post about how that went in the next few days, but let's just say that I fell afoul of some more of Wizardry's dirty tricks.  More on that next time.

Monday, August 9, 2021

Wizardry: Level 9 (a tale of two disasters)

My initial foray into level 9 was a disaster.  I began by exploring west of the elevator, and after only four moves I fell down a chute into a different area.  I tried casting DUMAPIC to get my bearings, but it didn't work.  I wasn't in an anti-magic zone, but that specific spell was being blocked.  Normally in this situation I would have cast MALOR and teleported to safety, but I didn't want to risk it without knowing my exact coordinates.  So I gritted my teeth, and set about exploring an area for which I had no map, and no obvious path back to safety.

The first thing I encountered was the following message: "Be it known that ye are trespassing on the property of the arch-mage Werdna. There is no possible way that ye can possibly get through my defenses, let alone defeat me in battle! So sure am I of this that I give you this clue, "contra-dextra avenue".  I was pretty sure this meant I was on level 10, and as I was close to full strength I decided to take a crack at defeating Werdna and finishing the game.  As for the clue, I tried running it through Google translate and got "against right avenue".  Searching the phrase in Google instantly brought up a translation from a Wizardry fan page, saying that it meant "don't go right".  Normally I wouldn't look up clues on fan-sites unless I was desperate, but this one just popped up in Google without me having to click through to the site itself.

A charming postscript from Werdna.

I explored down a winding corridor, and in the first room I was attacked by a group of monsters that included some Zombie Dragons.  I let fly with some MADALTOs, trying to keep my big spells in reserve.  None of the Dragons were affected, and their return volley wiped out both of my mages.  I managed to win through with melee, and some spells from my priests, but my party was in a sorry state.  Even worse, I was without a teleport spell to get back to the surface.  This was as grim as it had ever gotten for my party.

Fighting back against Zombie Dragons.

My priests still had some high-level spell slots left, so I decided to risk resurrecting my mages.  There are two resurrection spells: DI and KADORTO.  Both of these spells run the risk of failure, which reduces the dead character to ashes.  Only KADORTO can resurrect a character that has been reduced to ashes, but if that fails the character is lost forever.  (This same risk exists when resurrecting at the temple, but it's much lower.)

My first KADORTO reduced Misto to ashes.  My second KADORTO obliterated him completely.  That was it for Misto, there was no way of getting him back.  I was getting nervous now, because I had no KADORTO spells left.  If I cast DI on Merlin and incinerated him, I had no way to teleport to the surface, and my remaining fighters weren't going to survive the journey even if I found a way back.  Luckily, DI brought Merlin back, and I was able to MALOR back to level 2 and make my way to the castle.  (I teleported up 8 levels instead of 9, because I wasn't 100% sure if I was on level 9 or 10.  I didn't want to risk overshooting the mark and killing everyone.)

RIP Misto
Raise dead roll he missed-o

Misto was gone, but I still had Flanker, who I'd advanced to level 10 as a thief and then level 12 as a Mage.  I dropped him when I found out that his thief skills disappeared upon changing class, but now I was glad to have a high-level mage ready to go.  I did some quick grinding to get him up to level 13, but unfortunately he didn't learn TILTOWAIT, the best offensive spell in the game.  He did learn MALOR though, which meant Merlin had more TILTOWAITs to spare, so I still felt pretty good about it.

I quickly explored the rest of level 9, nervous about falling down another chute the whole time.  It ended up being a fairly small level, with a lot of unused space.  I am curious about all of those inaccessible squares; can I teleport in and explore them, or will doing so kill my party instantly?  It's not a risk I'm ready to take, but I might try once I beat the game.  (Or not, I need to keep my high-level characters for Wizardry II.)

Dungeon level 9

The fights were tougher on level 9, but at no point during exploration did I encounter anything I couldn't handle.  There were Trolls, Ogre Mages, various Mages and Priests, Demons...  As with previous levels I can't write knowledgeably about them because I was killing them too quickly to experience their special attacks.  At one point I killed four Giants that earned by party around 16,000 experience points each, easily the biggest reward in the game so far, but even they fell before they could get in a single attack.

Level 9 didn't have any stairs down (or stairs up for that matter; the only way to access the level was by the elevator).  The only way down to level 10 was the chute I had fallen down earlier.  I decided it was time to take on Werdna, but I didn't even make it to the chute.

The path from the elevator to the chute on level 9 is a short one, but this time around I was surprised by a group of level 10 mages (and some other monsters I can't remember) that proceeded to hit me with a barrage of high-damage spells.  The back half of my party went down immediately, and the front half followed soon after.  Everyone was dead, and I had no recourse but to start the game over from scratch.

Wizardry's death screen.

Thankfully, losing all of your party members in Wizardry isn't necessarily the end.  If you have a strong enough back-up party, you can find your original party's corpses in the dungeon, and bring them back to the surface.  Having lost my guys on level 9, I was going to need some very strong characters, but grinding in Wizardry doesn't take terribly long thanks to the Murphy's Ghost encounter on level 1.

My new party consisted of the following characters:

  • Faker, an evil dwarf fighter
  • Fraudo, another evil dwarf fighter
  • Pagan Pete, an evil gnome priest
  • Satanic Stan, another evil gnome priest
  • Spelric, an evil elf mage
  • Magical Gary, another evil elf mage

Most of my time playing this week was spent grinding these guys up while I watched episodes of WWF Heat from 1998.  It did seem a little odd to be using an all-evil party as my rescue posse, but I figured they were in it for the gold, and would loot the bodies of my original characters before raising them.  Once they advanced to level 12, I decided they were strong enough to survive a quick trip to dungeon level 9.

My rescue party ready to go.

Finding the bodies of dead character in the dungeon is done with the (I)nspect command, which searches an entire room or corridor.  The KANDI spell makes this easier, by telling you what level the dead characters are on, and the general area (south-west, etc.).  Apparently monsters can drag your characters to different areas, and sometimes their bodies will be devoured.  A few castings of KANDI revealed that my characters were all intact, and in roughly the same area in which they'd been killed.

Getting down to that room was easy: I just had to take the elevator from level 1 to level 4, then the other elevator from level 4 to level 9.  The room where my party had died was just two steps from the elevator, but there was one guaranteed fight along the way.  To make things harder, I couldn't go down there with a full party, as you need an empty space to carry a dead body.  That meant I was going down at somewhat less than full strength, and I'd have to do it six times.  I decided to leave Satanic Stan behind, as I wanted a full complement of front-line fighters, as well as both of my mages for maximum firepower.

The bodies of my party.  Penitent Pat is here, but I think it only
displays up to five names.

Luckily none of the encounters I had were super-tough; I was able to handle all of them with MADALTOs, and my six trips down to level 9 and back went off without mishap.  All of my characters were successfully raised at the temple, which meant I was finally back in action, and ready for another crack at Werdna.

Well, almost ready.  It turned out that some of my gear had been stolen, so I had to buy replacements from the store.  Most of my gear had still been there, but Roland was now forced to use a regular sword, and a few of my characters were a little worse off in terms of armour class.  I still feel like I'm ready to go and kill Werdna, and if I fail I know that I have a rescue party ready to go.  I'll miss my all-evil party, though.  Especially Magical Gary.

Sunday, August 1, 2021

Wizardry: Levels Six to Eight

My progress in Wizardry has been fairly slow-going, through a mixture of over-caution and lack of time.  But with my characters as high-level as they're reasonably going to get, and my rejection of the game's class-changing system, I was able to make some decent progress this week.  I said last time around that I might get through two dungeon levels for this post, but I actually made it through three.

That said, I could have easily skipped all of these levels and gone straight from level 4 to level 9 by using the elevator.  There's nothing on levels 5 through 8 that makes them worth exploring, and their sole purpose seems to be the accumulation of experience and treasure.

Dungeon level 6

Level 6 is interesting in that it you could mistake it as being 17 x 17 instead of the usual 20 x 20.  The areas to the east and north are only accessible by a single secret door.  There's very little to find out there, unless you're looking for stairs to go down instead of using the elevator.

The only other thing of interest is an encounter with three humanoid figures: a barbarian with a glowing sword, a "sexy female mage", and another that looks like a huge ogre.  The barbarian calls out to "Ariel and Ookla" before the trio disappears around a corner. This a reference to the cartoon Thundarr the Barbarian, and must have been a pretty late addition to the game: Thundarr debuted in October of 1980, and Wizardry was almost ready to go by then even though it wasn't released until September of 1981.  I never saw Thundarr growing up, but I really should check it out, as it's written by a bunch of my favourite comic writers and has production design by legendary comics artist Jack Kirby.  It's kind of an irritating inclusion here, though. Not only does this scene serve no purpose, but it happens every time you enter the relevant square, which means Thundarr, Ariel and Ookla are constantly running up that same corridor.  I guess they really need to improve their mapping skills.

I suppose that in the world of Wizardry, "sexy" is an objective term.

Level 7 is laid out as a grid, with nine distinct areas and enough symmetry for it to be potentially confusing.  Adding to that confusion are a few well-placed teleportation squares, which give no delay or warning when they're activated.  I did get myself turned around on a few occasions here before I realised what was going on, but at this point I was still surprised at how easy to map this game has been.  Wizardry has an unforgiving reputation, but at least in mapping terms I've been finding it quite breezy.

Dungeon Level 7

Level 8 is where things started to get a little hairier in that regard.  The middle area, with its layout designed to look like the initials of creator Robert J. Woodhead, is not so bad.  (Decide for yourselves if that design choice is cute or obnoxious.)  The top two corners are where things get more difficult.  At the top right is a room in complete darkness, that teleports you into the room's center as soon as you enter.  That one's not so bad once you figure out where and when the teleportation is happening.

More irritating is the room to the top right, which is full of spinners.  You can enter this room via teleportation, or by taking the stairs down from level 7.  Note that there are no stairs back up; if you came down here without the Blue Ribbon needed to use the elevator, you'd need a MALOR spell to get back out again.  Even with all the spinners, though, this room isn't so difficult to escape.  Spinners only turn you around when you enter their square; after that you can reorient yourself as normal.  As long as you hug the walls it's no problem at all to edge around and find the secret door that exits to the north.  (I think I'm more annoyed by this level's needless wrapping.  Couldn't they have shifted everything down a couple of squares, so that the rooms aren't split across the top and bottom of the map?  I kind of hate levels that wrap around to begin with, and stuff like this just makes that annoyance even worse.)

Dungeon Level 8.  Note that the area I've mapped
is only 20 x 17; there's a 3 x 20 area on the east side
of the map that's inaccessible.

I'm still getting through the combats with little trouble, mostly by blasting my enemies with MADALTO and LORTO, or with TILTOWAIT and MALIKTO (a priest spell that instantly kills most foes) when things look really tough.  I've occasionally been caught with my pants down by underestimating how much spell power to use, and Misto and Merlin have both required a couple of resurrections.  But by being generous with attack spells and returning to the castle regularly I've been able to survive everything so far.

Unloading with a TILTOWAIT

I am starting to have some trouble with traps though.  Without a thief I'm just using my other characters to disarm traps, and its becoming less successful as I descend further into the dungeon.  At the moment I'm pretty much resigned to setting off any traps I discover; I just identify them with CALFO, and make a decision as to whether I want to suck up the consequences or not.  ALARM? Sure.  SPLINTERS, or ANTI-MAGE?  Probably not.  For the most part, I try to avoid traps that I think will affect the entire party.  Misto and Merlin are drastically low on hit points compared to everyone else.

It is worth opening chests, though, because it's the best way to find magic weapons and armour.  All of my characters have +1 weapons now, and it's a made a big difference to their effectiveness.  I'm not sure how magic weapons work in Wizardry.  In Dungeons & Dragons, they simply give you a bonus to attack and damage rolls.  In Wizardry, I noticed that my cleric started making multiple attacks when I equipped a +1 mace.  I also levelled up at the same time, so I'm not sure if it's the weapon or the levels that did it.  Equipping a Dragon Slayer sword also solved my problems with Mean Joe's drop in effectiveness.  He's not quite back up to where he used to be, but he's not far off.

"Yeah man, Wizardry is awesome!  You go into a  dungeon
and thrust at men in leather!"

I only have two more duneon levels to go, and I expect things to ramp up from here.  I'm not all that worried about being wiped out in a fair fight, or killed by traps.  If I do get wiped out, it's almost certainly going to be the surprise mechanic that does it.  If I don't get ambushed by some powerful spellcasters and blown away, expect a victory post in the near future.  If I do, well... it's back to level one I guess.

Monday, July 26, 2021

Wizardry: Level Five

I finally reached my grinding goal of getting all my characters to Level 13.  While it took me a few weeks in real-world terms, it was only a few hours of game time (although keep in mind that I did it with the emulator speed cranked up).  Wizardry's not a long game, and reaching high levels can be done pretty quickly, but as I've said before my time has been limited, and I haven't been all that excited to spend it on playing ancient CRPGs.

A little bit before getting my characters to Level 13, I decided to have a couple of my characters change class.  The first change I made was to have my thief Flanker change into a mage.  I would have preferred a change to cleric, but I was restricted by alignment.  I got Flanker to around level 8 as a mage before having second thoughts about the whole thing.  What I'm unsure about is whether he even keeps his thief skills after changing class.  He certainly didn't keep his Agility or Luck scores, and I gather those are important when disarming chests.  So I dropped him for now, and swapped Penitent Pat back in.  I've been disarming traps with my non-thief characters, which has been reasonably effective, and I much prefer the balance of having two priests in the party.

The other change I made was to convert Mean Joe from fighter to samurai.  This one was a disaster.  Joe went from a killing machine to one of the most useless members of the party.  I'm still keeping him in the front line, because he has loads of hit points, but his melee damage output isn't even close to what he was dishing out before.  At first I thought this was because he lost his multiple attacks, but I've levelled him up to the point where he's gotten those back.  The real problem here is that characters get their ability scores reset when they change class, and those new totals are really low.  Mean Joe's Strength of 18 was a big asset, and it's not one that he's ever going to get back.  Changing to Samurai got him some mage spells, but the trade-off hasn't been worth it so far.

So for the moment I'm steering clear of the class-changing system.  I've probably just used it badly, but it feels to me as though characters lose almost everything by going back to level 1 and having their stats reset.  I'll stick with Mean Joe, and hope I find a weapon or something that can bring him back up to par.  As for the rest, I'm going to keep my fighter, two priests and two mages.  Hopefully that'll be good enough.  I was considering turning my priest Pious Pete into a lord (for better melee capabilities), both of my mages into priests, and Penitent Pat into a mage, but now I'm not so sure.  I'm hesitant to screw things up after what happened to Mean Joe.  ("Look how they massacred my boy" I say, having just watched The Godfather for the first time ever.)

I explored dungeon level 5 using the elevator that I'd previously unlocked on level 4.  My first foray was somewhat disastrous: I encountered a group of Level 7 Mages, and underestimated the amount of spell power I needed to unload on them.  (I think I typed MAHALITO instead of LAHALITO, and ended up casting the weakest of the game's mass damage spells. It's an easy mistake to make.)  The Mages cast their own mass damage spells on me in return, and both of my mages were killed.  I had my priests finish them off with LORTO (a mass damage spell that slices the enemy with spinning blades), and quickly high-tailed it back to the castle to resurrect Merlin and Misto at the temple.  (I could have had my priests do it with a DI or KADORTO spell, but I was wary of the manual's warning that DI isn't as effective or safe as using the temple. Besides, I have plenty of gold.)

Taking stock of my casualties between rounds.

Dungeon level 5 used the entire 20 x 20 grid, unlike level 4, but it didn't have any special encounters at all.  The only noteworthy area was a large central room where spellcasting didn't work.  I was lucky enough to get through that area with only a couple of easy random encounters; I suspect that meeting the wrong enemies in that place could go very badly.  I have no idea if anti-magic zones affect the monsters as well as the party, but I'm not anxious to find out.

There are a bunch of one-way doors throughout the level, one spinner, and a corridor with a darkness zone.  Overall, I'm surprised at how little Wizardry has put these tricks to use.  I'm accustomed to the Bard's Tale series, which will drop spinners and darkness zones all over the place.  Wizardry has been sparing with them, and so far its levels have been pretty simple to map.

Wizardry Level 5.  The light blue area is an anti-magic zone.

In terms of encounters, I've been blowing through most of them with LAHALITO, LORTO and MADALTO (a highly damaging frost spell).  One of my mages got TILTOWAIT upon reaching 13th level; this spell does 10-100 damage to every monster in the combat, which at this point sounds to me like pressing the "automatic win" button.  I haven't used it yet, and I'm not even sure why not.  I think I've been saving it for a really hairy encounter, but there's no reason not to drop it on some unsuspecting kobolds on my way out of the dungeon.

I did have one scary moment, when I was surprised by a group of 7th Level Mages (those guys again).  There was nothing I could do except watch as my characters got blasted over and over.  Penitent Pat and Misto got killed, and Merlin was left with only 2 hit points.  I annihilated them with LORTO and MADALTO in the next round, but I'm pretty sure the only reason I survived is that a couple of the Mages had attacked rather than cast spells.

After that hair-raising encounter I decided to use MALOR (teleport) to escape the dungeon as quickly as possible.  I'd been reluctant to use MALOR thus far, instead opting to take the elevator back to the surface: I'm well aware that giving MALOR the wrong coordinates can kill your entire party if you land in solid stone.  I'd been mapping carefully though, and knew exactly where I was, so I was able to land directly on the level 1 stairs to the castle.  Once again, all of my character were resurrected safely.

Setting my coordinates for a MALOR teleport.

Aside from that, my only other setback came at the hands of an ANTI-MAGE trap.  I'd set one of these off much earlier in the game, and it had paralyzed both of my mages.  I took the risk, and this time one of my mages was turned to stone.  The other was paralyzed, as was Mean Joe; it turns out that this trap affects anyone who can cast mage spells, not just those of the mage class (I guess that's a downside of class-changing to give everyone spellcasting, you could get wiped out by a single trap).  I was able to use the MADI spell (which cures all conditions and restores the target to full hit points) to fix everyone, but that trap was a lot nastier than I was expecting.

STONED.

It's possible my next post might cover multiple dungeon levels, as I'm done with grinding for the moment (and will be done for good unless I change my mind about class changing).  Of course this all assumes that I don't suffer some kind of major setback, but so far so good.

Wednesday, July 21, 2021

Wizardry: Level Four

Once again I got bored with grinding, and decided to take my chances by descending to the 4th dungeon level.  I'd already been down there briefly, having taken the elevator and found two signs warning me to keep out.  This time I took the stairs, with a healthy amount of trepidation.  (This is the major appeal of playing games where you can't just reload a save: the consequences of every action are irreversible, so there are genuine nerves every time a new action is taken.)

This time I took the stairs down from level 3 to level 4.  I was prepared for a lengthy mapping session, but this level didn't take long to explore at all: whereas the previous levels had used most of their 20 x 20 grid, level 4 had lots of unused space.  The stairs down led to a long east-west tunnel.  Exploring west led to a dead end, and an area with a loop of doorways.  Exploring east led to another loop of doorways, where I found the stairs down to level 5.  One of the doors leading to the stairs had some suspicious disk access after I passed through it; I checked a walkthrough map afterwards, and discovered that I wouldn't have been able to get through without the Bear Statue that I'd found on level 2.

The very sparse map of level 4

Having explored the areas accessible via the stairs, I figured that the most interesting parts of the level must be accessed via the elevator.   (On levels 2 and 3, the areas accessible by elevator were blocked from the rest of the dungeon, and had nothing interesting to find.)  I tried the north passage first, past a sign reading "Testing Grounds Control Centre", mostly because that area of the map was more open than the south passsage.  (As it turned out, I wouldn't have been able to explore south yet anyway.)

As soon as I stepped past the sign, an alarm sounded, and on my next move I was attacked by 7 3rd Level Ninjas.  I made short work of them with spells, and continued exploring.  There were two ways forward: one past a sign reading "Treasure Repository", and the other past a sign reading "Monster Allocation Center".  The "Treasure Repository" door led into a room where I was attacked by a group of Werebears.  I suspect that these enemies had more hit points than anything else I'd faced so far, but with the amount of offensive magic I had by this point I was able to blow them away with ease.

I also fought a Dragon after going through the alarm square.
It died quick.

Exploring through the "Monster Allocation Center" door, I was immediately attacked by what I suspect is a unique encounter: two Lvl 7 Fighters, two High Priests, two Lvl 7 Mages, and a High Ninja.  Again, I blasted the hell out of these guys.  Now that my priests can cast LORTO (a wall of blades that deals 6-36 damage) and add their offensive power to that of my mages, I'm able to wipe out everything I encounter almost immediately.

The toughest fight yet, I guess.

Past this room I entered a smaller room that was described as containing a desk covered in wizardly paraphernalia: scrying glasses, amulets of summoning, and other items all conveniently destroyed.  Just as I entered a panel in the east wall was closing, and I was told that nothing I could do was able to open it.  Curious as to who I'd just disturbed, I continued forward.

The next room had some answers, as I got the following lengthy message:

As the party enters the room, the door slams shut, glows bright orange, and disappears. A door appears to the right. A voice from no apparent direction can be heard. It says: "Congratulations, my loyal and worthy subjects. Today you have served me well and truly proven yourself worthy of the quest you are now to undertake. Several years ago, an amulet was stolen from the treasury by an evil wizard who is purported to be in the dungeon immediately below where you now stand. This amulet has powers which we are now in dire need of. It is your quest to find this amulet and retrieve it from this wizard. In recognition of your great deed today, I will give you a blue ribbon, which may be used to access the level transporter on this floor. Without it, the party would be unable to enter the room in which it lies. 
Go now, and god speed in your quest!"

So that's my quest: an evil wizard  has stolen the amulet of King Trebor, and I have to get it back.  Am I to understand that the first four dungeon levels are under Trebor's control?  And that I've just won the right to enter the levels below, controlled by this evil wizard?  I guess it makes sense of the Proving Grounds name, although that would make Trebor the titular Mad Overlord, and potentially not someone for whom I should be retrieving magic amulets.  (The evil wizard Werdna isn't named here, and I don't think he was referenced in the manual either.  He was named on a "briefing" that apparently was included as a slip of paper with the game, but I'm curious to see when he first gets a name in the game itself.)

With the Blue Ribbon in my possession I was able to get through the door south of the elevator.  This revealed another elevator, with buttons marked A through F.  In any other game I'd mash that F button and try to take on Werdna right away, secure in the ability to reboot a save, but that's not an option here.  As I've been doing so far, I'm taking this slowly and cautiously.

As I noted above, my current spell power is such that I've been blowing through the various monsters I've encountered.  I've probably been over-cautious with the amount of grinding I've done, but as I noted above, choices in this game have consequences, and I don't relish starting over.  I won't make a list of the monsters I've fought, because I've been killing them too quickly, so I have no idea what their  special abilities are.  I did get a little nervous when confronted by some Gas Dragons, but a MADALTO spell (a cold blast dealing 8-64 damage) put them away very quickly.  My biggest setback came when I encountered a group of Shades, one of which drained my fighter Roland from level 12 down to level 11.  That's a lot of experience to make up, but aside from the loss of a few hit points it didn't affect his combat ability in the slightest.

(Level drain comes directly from Dungeons & Dragons, where certain undead monsters will drain your character of an experience level with a melee hit.  It's somewhat controversial these days: a lot of players hate it, and a lot of DMs refrain from using it.  I like it as a tool for instilling genuine fear and hesitation in players, but it only works in certain styles of game; modern D&D kind of relies on the PCs all being of roughly the same level, so I can see why level drain gets left out.  Plus it's super-deflating to have months of work go down the drain due to a single bad combat.  But it fits well in multi-level dungeon crawls where the PCs control the danger level by choosing which dungeon level to explore, and that's the type of play that Wizardry is emulating.)

Roland after having been level drained.

Reading back over my posts, I noticed that I've avoided writing about whether I'm enjoying the game or not.  That hasn't been deliberate, but there are reasons for it: multiple lockdowns, my entire family life being turned upside down, moving house, and so on.  I haven't been in a great headspace for this kind of game, and as such playing Wizardry has felt like a chore.  I can recognise the quality behind it; it's absolutely one of the most well-crafted games of its era, and it's likely that under different circumstances  I'd be loving it.  At the moment, the prospect of another session doesn't really excite me, but I'll keep plugging away.  I just hope that the first time my party gets wiped out won't discourage me from playing completely.

Monday, July 12, 2021

Wizardry: Grinding Interlude

I mentioned in my last post that I haven't had much time for gaming, and that has held true for this week as well.  I only managed a couple of grinding sessions, and a very small amount of exploration, but in the interests of keeping a regular posting schedule I'll make a quick update.

Most of my characters are sitting on level 12, just one level shy of my grinding goal.  I did this by cranking up the emulator speed and repeatedly fighting Murphy's Ghosts on the first dungeon level, with AEW Dynamite playing in the background.  Once my spellcasters hit level 13 my they'll have learned the most powerful spells in the game, and that seems to me like a good time to change class.  After all, there's very little point to levelling up as a mage or priest once there are no new spells to learn.  My characters all need roughly 160,000 experience points to reach the next level, so I'm at the point where it's diminishing returns for pretty much all of them.

While I was grinding I added my thief Flanker back into the party.  He was already 5th level, and for whatever reason I prefer the idea of changing his class to a spellcaster more than changing one of my spellcasters to a thief.  My current plan is to change Flanker and my priest Pious Pete into mages, and change my mages Misto and Merlin into priests.

As for my fighters, Mean Joe and Roland, I'll probably change their classes too; the experience required to level up is getting prohibitively high.  I'd like to change one into a Samurai and the other into a Lord, but I stuffed up during character creation and made them both Neutral in alignment.  That precludes them from becoming Lords, so I guess I'm going to have two Samurai.

Aside from grinding, the only thing I did was make a quick foray into the 4th dungeon level by way of the elevator (with four buttons marked A-D).  It led to an area with long passages north and south, both blocked by doors with signs.  The south door's sign said that it was a private elevator, for authorized users only.  The north door was the "Testing Grounds Control Center", and a warning said that it was strictly off-limits.  I decided not to open either, as I expect they both hold either a trap or a difficult battle.  Once I get my characters to 13th level and earn some experience in their new classes it will be time to tackle dungeon level 4.

Nobody finishes RPGs by obeying "Keep Out" signs.