Tuesday, October 27, 2020

Ultima: Through Farthest Lands and Deepest Dungeons

Having fully explored two continents, and completed the quests ordained by the kings of Castle Barataria, Castle Rondorlin, the Castle of Lord British and the Castle of the Lost King, there was little for me to do but head off across the ocean once more to find new land.  The third continent I discovered was - like the two before it - based on the same basic shape, with the cities and dungeons located in the same places.  I spent a good amount of time on mapping, even though by this point I had realised that it was pointless.  The only things I absolutely had to find were the castles and landmarks, and with the continents being nearly identical that wasn't hard.  What can I say, I like mapping games based on a grid, and I'll keep at it as long as the process isn't too frustrating.  In the case of Ultima I was far more powerful than the monsters I was encountering, so the mapping was fun.

A map of Ultima's third continent.

I've listed out the towns and dungeons for the previous continents, so I guess I should do it here as well for the sake of consistency.  Here are the towns on the third continent:

  • Ponder, on the eastern side of the inlet on the south coast.  (There's a town called Ponder in Texas, which might be the inspiration for this name.)
  • Nassau, on the north side of the central bay, not far from the castle. (Garriott grew up in Nassau Bay in Texas, so this is undoubtedly named after that city.)
  • Stout, on the shore of the south-eastern lake.
  • Clear Lagoon, on the north coast. (Garriott's hometown was in the Clear Lake Area, and there's apparently a Clear Lagoon in Texas City; either could be possible influences.)
  • The City of Imagination, at the tip of the inlet near the east coast.
  • The City of Wealth, to the north-east.
  • The City of Poor, to the north-west.  (Check out that searing social commentary.)
  • Gauntlet, in the central forest grove.

The dungeons are named as follows:

  • The End.... (complete with ellipses), on the west coast.
  • The Metal Twister, in the mountain range to the south-west.
  • The Trolls Hole, on the south coast.
  • The Guild of Death, on the small island in the centre of the bay.
  • The Slow Death, at the tip of the peninsula on the east coast
  • The Vipers Pit, which has two entrances: on west of the Slow Death, and the other on the continent's north-west, in a forest valley.
  • The Tramp of Doom, on the north coast.
  • The Long Death, in the mountain range north-west of Gauntlet.

The first of the castles I located was the Black Dragon's Castle, on the western side of the central bay. The quest he gave me was to "go forth and kill a Liche", so there was definitely more dungeon delving in my immediate future.

On the north side of the bay was the Castle of Olympus, where the king told me to "go and find the sign post".  This was a little less mythically epic than the other quests I'd been given, but I'll take my stat boosts where I can get them.  This continent has two landmarks: the Southern Sign Post, and the Sign Post.  The first of those is found on the east coast, and is connected to the mainland unlike its island-based counterparts on the previous two continents.  The Southern Sign Post features the Latin phrase "omnia mutantur" ("everything changes"), and gave me a boost to my Charisma.  The Sign Post, found on a mountain-ringed island to the north-west, was the object of my quest. It's Latin phrase is "ultima thule", and it gave me a boost to Stamina.  As with the other "landmark quests" I'd completed, the king of the Castle of Olympus rewarded me with a bonus to Strength when I returned to him.

Finding the Sign Post.

(A quick note about the phrase "ultima thule".  In ancient times it referred to the northernmost location mentioned in Greek and Roman literature, and later on it became a phrase representing any land beyond the borders of the known world.  It's difficult to guess where Garriott got the phrase from, but the Edgar Allen Poe poem "Dream-Land" does feature the phrase, as well as the line "Out of Space - out of Time".  It seems a likely connection.)

I did my Liche-hunting in the dungeon known as the Guild of Death.  The dungeon is located on a small island, but by this point I wasn't worried about the consequences of dying.  I'd accumulated enough hit points that I could survive pretty much anything the dungeons could throw at me.  I mapped my way down to level 7, found and killed a Liche almost instantly, and made my way back to the Black Dragon's Castle.  The king rewarded me with a blue gem, and the following hint: "the princess will help a space ace through time!".

Fighting a Liche.

That last hint was the one that I needed to piece everything together.  From hints obtained while drinking at the bar I knew that I needed to travel back in time and stop Mondain from creating his gem of immortality.  One of the kings had told me that I'd need a time machine to complete my quest, and another had told me that I needed four gems.  I'd found three of the gems, but no sign of the time machine. Now, with this new hint from the king, I knew that I had to rescue the princess in order to find it.  I'd rescued her before, but had received no special reward beyond gold and experience points.  To get that special reward I needed to become a "space ace", which the barman had previously told me required going to space and killing at least 20 enemy spaceships.  I now had three specific tasks: obtain the fourth gem, go to space and become a Space Ace, and rescue one of the princesses.

The third gem, and a vital clue.

I didn't feel ready to go to space yet, so I skimmed across the ocean in my air-car to the fourth continent.  This continent still uses the same template, but it's a little more broken up by rivers and the ocean.

The last continent!

Again, for the completist in me, I must list out all of the towns and dungeons.

  • Dextron, on the western inlet.
  • Gorlab, near the castle at the centre. (This is obviously Balrog spelled backwards, although in Ultima it should probably be spelled Norlab.)
  • The City of Lost Friends, on the west coast of the northern section.
  • The City of the Turtle, to the south-west.
  • Bulldozer, on the east side of the southern bay.
  • The City of Magic, near the south-eastern lake.
  • The City of the Brother, on the island to the east.
  • Wheeler, in the central forest grove. (This is another one that could be named after a town in Texas.)

And the dungeons:

  • The Morbid Adventure, on the small island near the centre.
  • Spine Breaker, to the far north-east.
  • The Skull Smasher, on the north coast.
  • Dungeon of Doom, in the mountains north-west of Wheeler.
  • The Dead Cat's Life has two entrances, one in the mountains west of Wheeler and the other on the island in the southern bay.
  • Dead Man's Walk, on the west coast.
  • Hole to Hades, at the top of the southern peninsula.
  • Free Death Hole, in the labyrinthine mountains to the east.

This continent's landmarks were the Grave of the Lost Soul, and the Eastern Sign Post.  The latter of these - found on the small island to the north - was very unhelpful, simply saying "go east to go east" and providing nothing in the way of a stat boost.  The Grave of the Lost Soul was the object of the quest I was given by the king of the White Dragon's Castle.  Entering it gave me a boost to my Stamina, and the Latin phrase "vae victis" ("woe to the vanquished").  As expected, I got a boost to my Strength from the king upon my return.

Oh yeah, visiting graves is a real helth-booster.

The last castle I located was the Castle of Shamino, a welcome surprise.  Shamino goes on to become one of the more well-known NPCs of the series, but at this point he's another alter ego of Garriott himself (Shamino Salle Dacil being his name in the Society for Creative Anachronism, a group of medieval reenactors and inveterate drunkards who bash each other with sticks).  Shamino gave me my final and most difficult quest: to slay a Balron.  (They were called Balrogs in Akalabeth, but here they get a rebranding.  A similar things happened to Balrogs in Dungeons & Dragons after some words from the Tolkien Estate, so I figure the same happened to Garriott or he was exercising caution to avoid any legal action.)

For this quest I had to delve all the way down to dungeon level 9, where the strongest monsters dwell.  I chose the Dungeon of Doom for its close overland proximity to the city of Wheeler, and as usual I set about mapping all of the levels along the way.  Everything was going very smoothly, until I had to spend some extended time on level 7 and 8.  On my last visit I'd only stayed around long enough to kill a Liche, but this time my desire to map everything led me into conflict with my most hated enemy of all: the dreaded Gremlin.

Seriously, fuck these guys.

Anyone who's played an early Ultima already knows what I'm talking about, and some of you might remember them from my coverage of Akalabeth, but goddamn do I hate Gremlins.  They don't target hit points, but instead on a successful hit they eat half of your food.  It doesn't matter how much you have, they'll eat half of it, and it only takes a few hits before things start to look grim.  Ultima gives you no leeway whatsoever in regards to food; once your food counter reaches zero, you're dead.  I had a number of very close calls while mapping levels 7 and 8, the closest the game has come to killing me so far.

What made this even worse is that I went to the
Magic Shop first by mistake.


While exploring level 8 I started to get annoyed with how many hits it was taking to kill the enemies, so I took some time to buff my stats by visiting various landmarks: I still needed to boost my Stamina, Charisma and Strength.  The first two were easily done by repeatedly visiting the Grave of the Lost Soul and the Southern Sign Post.  Strength was a little trickier, as it required completing a quest and returning to the king.  I spent a good while going back and forth between the Grave of the Lost Soul and the White Dragon's Castle.  Eventually, I managed to get all of my stats up to 90.  The manual claims that these scores can be raised to 99, but if there's a way to do it it's not by visiting landmarks or completing quests.

I got myself into another dilemma at about this point: I could no longer buy weapons or armour.  My Reflect Suit had been eaten by a Gelatinous Cube, but when I returned to town to buy another one I was told that I couldn't carry any more stuff.  I tried dropping and selling some things, but it still didn't fix the problem.  All I had left armour-wise was a Vacuum Suit, which I equipped before realising that I might have made a mistake.  You see, the Vacuum Suit is vital for space travel in Ultima.  Vital as in you die if you haven't got one.  If I lost this one, I was worried that I wouldn't be able to buy another one, and if that was the case I'd have to start over.

When I returned to the Dungeon of Doom, I used Ladder Down spells to quickly move through levels 3 and 4, and avoid all Gelatinous Cubes.  Once on the lower levels, I noticed that I was dealing more damage, and that the monsters were doing less to me in return; my stat boosting had paid off, albeit in a small way.  The monsters on level 9 were still doing around 250 points of damage per blow, so I didn't want to stick around for too long.  The second monster I fought on level 9 was a Balron, and even with my stats boosted it took absolutely ages to kill.  I'm lucky nothing else snuck up behind me while I was fighting the thing.

The blank stare of evil.

With the Balron dead, I zipped out of the dungeon and returned to Shamino. He rewarded me with a white gem, but unlike the other kings he didn't have a hint for me.  Instead, he allowed me to take 9 items from his stores.  I made straight for the Armour room, and came out with a few Reflect and Vacuum Suits, so I needn't have been so worried about my inventory problems; for whatever reason, I had no problem adding items to my inventory here.

With all four gems in my possession it was tempting to press on and complete the game, but instead I ventured back into the Dungeon of Doom to check out what other monsters roamed the lowest dungeon levels (and also to confirm that dungeon level 10 is the lowest depth).  The monsters found on dungeon levels 7 and 8 are as follows:

  • Liche. A disembodied head, as I described in my last post.
  • Wandering Eye. A beholder stand-in that thankfully has no special abilities.
  • Tangler.  A kind of weird amorphous creature, I'm not even sure what it's meant to be.
  • Wraith. Does a lot of damage, but seems to have no special abilities.
  • Gremlin. I've described their food-stealing abilities above. Possibly my all-time most hated RPG enemy.

These monsters are on level 9 and 10:

  • Invisible Seeker.  They don't have any special abilities, but as the name says they're invisible. You have to guess where they are to attack them.
  • Mind Whipper.  Aside from looking pretty rad, I suspect that these stand-ins for D&D's Mind Flayer drain Intelligence.  I'm not completely sure, but I did notice that my Intelligence score had been lowered after this dungeon foray, and they seem like the most likely culprit.
  • Zorn. A stand-in for the D&D Xorn. Xorns eat gems in D&D, but in Ultima they have no special abilities.
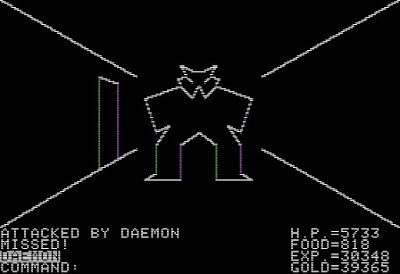
  • Daemon.  Tough, but with no special abilities.
  • Balron.  Even tougher, but also with no special abilities.

Not gonna lie, this guy looks pretty dope.

A baggy-shirted Daemon.

That's its mouth on top of its head, if you're wondering.

The most accurately depicted monster in the game.

I did press on playing after this, but I'll end the post here.  My next goal is to head into space to become a Space Ace, which involves Ultima inexplicably becoming a 3-D space combat game.  I mentioned before that this game is wild, didn't I?

Wednesday, October 21, 2020

Ultima: Dungeon Fundamentals

Having explored two of the game's continents, I had been given a number of quests by the kings of four separate castles.  I'd yet to complete two of those quests.  The Lost King, residing on the first continent I explored, had told me to "go now and kill a Gelatinous Cube".  On the second continent, the king of Castle Rondorlin said that I needed to kill a Carrion Creeper (a pretty obvious stand-in for D&D's Carrion Crawler).  I was getting a little tired of mapping the wilderness - a probably side-effect of noticing how similar the two continents are - so I decided that now was the time to mix it up with a bit of dungeon exploration.

Now that I think of it, the game doesn't tell you anywhere that these monsters are found in the dungeons.  I'm being guided by knowledge from previous play-throughs, so I know where to go, but someone unfamiliar with Ultima would be completely in the dark here.  I'm trying my best to approach this game from the standpoint of someone who hasn't played it before, but it really is impossible. The best I can do is try to call out these moments when I notice them.

I left off my last session near the castle of Lord British.  The nearest dungeon was Montor to the north-east, so I chose that one to explore.  I suppose that Mondain's Gate to Hell is actually closer, but it's also across the ocean, so I ignored it.  I'm not sure what happens when you die in this version of Ultima, and I don't want to risk being stranded on an island without my air-car.  So Montor and its easy overland route seemed like the safe choice.

A dungeon exploration screenshot from an earlier session.

The dungeons in Ultima run off a similar engine to Akalabeth, albeit one that seems to run much slower.  The view switches from the tile-based overhead view of Ultima's wilderness exploration to a first-person perspective.  Movement uses the same keys, with Enter moving forward, the "/" key turning you around, and the left and right arrows turning you in the appropriate direction.  If you leave the keyboard alone for a few seconds a turn will pass, so it's kind of in real time.

Every dungeon level has the same basic layout, with the only impassable walls being those shown below.


The major difference between each level is the position of the various doors and secret doors.  As with Akalabeth, a door takes up an entire square on the map, which I always find confusing at first.  Adding to that confusion is that the doors are sometimes replaced by chests or impassable force fields when you transition between levels. The ladders up and down between levels are always in the positions marked above, with up and down alternating from level to level.  The only exception is on level 1 where the ladder up is in the bottom right corner.  This all makes dungeon navigation fairly trivial, although I've still been diligently mapping the levels.  Here are some examples from the Dungeon of Montor:

Brown squares are doors and blue squares are
secret doors. P denotes an open pit, while T is a
hidden pit that dumps you to a lower level.


Monsters roam the levels in a seemingly never-ending supply; I don't think levels can be cleared out like they could in Akalabeth.  Combat involves trading blows with the (A)ttack command, as in the wilderness, but there are additional tactical concerns.  You can be surrounded on four sides, but you can also use positioning to your advantage, and fire at monsters from a few squares away if you have a missile weapon.  Speaking of which, it seems that the bug from Akalabeth that allowed the player to fire through walls has been eliminated.

Killing monsters rewards you with gold, as well as experience.  Any experience earned in the dungeon gives you double that amount in hit points when you make it back to the surface.  Grinding on the first few dungeon levels can net you a lot of hit points, but at around level 6 I found that I was losing more hit points than I earned.

Each grouping of two dungeon levels has it's own set of monsters, some of which have their own special abilities. I'll run through those that I've encountered so far.

Dungeon level 1-2:
  • Ranger. A fairly weak enemies with no special abilities.
  • Skeleton, ditto.
  • Bat.
  • Giant Rat. They seem a little stronger than the other enemies on these levels.
  • Thief. Not that strong, but on a successful hit they will steal one of your unequipped weapons. I lost most of the weapons I'd acquired at the Pillars of the Argonauts in this manner.

Dungeon level 3-4:
  • Giant Spider.
  • Viper.
  • Cyclops.
  • Orc.
  • Gelatinous Cube.  This monster will dissolve your armour on their first hit.  They can also be difficult to see at times, being depicted as a transparent square, which fits their D&D abilities really well.

Fighting a Gelatinous Cube with a coffin in the foreground.

Dungeon level 5-6:
  • Ettin, a kind of two-headed giants cribbed from D&D.
  • Minotaur.
  • Carrion Creeper. These guys are depicted graphically as crawling on the roof. This doesn't stop them from being blocked by hidden pits though.
  • Mimic.  They are graphically identical to treasure chests.
  • Lizard Man. They remind me of the absurd power levels you can reach in Akalabeth by transforming yourself into one of these monsters. Whenever I fight them here I like to think that I'm fighting an adventurer who has done just that.

Dungeon level 7-8:
  • Wandering Eye.  They look similar to Beholders from D&D. They don't have any of the special abilities from D&D thankfully. In future Ultima installments they'll be known as Gazers.
  • Liche.  They're depicted as floating heads.  I suspect that Richard Garriott was thinking here of D&D's demi-lich, which is a lich that has decayed to the point where only its skull is left.

I haven't explored any deeper than level 7, and I didn't stick around on that level for any great length of time.  I have no idea how deep the dungeons go.  I suspect ten levels, although the dungeons in Akalabeth were theoretically infinite.  I'll probably have finished dungeon delving in my next post.

In addition to monsters, there are coffins and treasure chests that contain gold.  I haven't encountered any traps on the treasure chests, but sometimes when I open a coffin there's a monster inside.  There are also pits.  Some are visible, and you can walk over them freely, or use them to drop down to a lower level.  The ones that are invisible will dump you down to a lower level without warning, but you can find them by using the (I)nspect command from one square away.  You can also avoid them by carrying rope and spikes, which can be bought at the weapon store.  I've noticed that these hidden pits only ever appear in the spaces between two impassable walls, so they're pretty easy to find.  Monster won't walk over them (even the monsters that can fly or crawl on the ceiling), so that's another way of figuring out where they are.

Some squares contain force fields, which look like laser barriers and are impassable.  You can't shoot through them either.  I gather that these force fields can be created by characters with the Create spell, and likewise gotten rid of with the Destroy spell.  I don't have access to either spell, so my only recourse is to go around them.

A Carrion Creeper behind a force field. The square I'm in has
a ladder going up, viewed from the side. You can't (K)limb a 
ladder unless you're facing it.

It didn't take long for me to complete my first quest; I had loads of hit points, and Gelatinous Cubes are found on level 3, which isn't too deep.  Along the way I did some mapping, and tested out a bunch of my new weapons.  The Triangle (a type of magic sword) worked here, and did quite a bit of damage.  For some reason it hadn't worked for me in the wilderness, I'm not sure what's going on there.  After a bit of experimentation I went back to my trusty Blaster, which does high damage and can be used at range.

At first I was pretty much impervious on the first few levels, probably because of the Reflect Armour that I was wearing.  That changed after I fought a Gelatinous Cube, and my armour got dissolved.  I was taking about 50 points of damage per attack on level 3, which isn't much when you have a few thousand to spare, but I decided not to stick around.  I had some other suits of armour, but for some reason the (R)eady command doesn't give you the option to put armour on when you're in the dungeon.  I'm not sure if this is a deliberate choice, an oversight, or a bug, but it's pretty annoying.  As soon as I left the dungeon I had to go to Paws and buy a new set of Reflect Armour.

Upon returning to the Lost King to report the completion of my quest (presumably with a handful of dead Gelatinous Cube as proof), I was rewarded with a red gem.  I was also told that I would need four more gems to complete my quest.  Four gems, four castles, and I suspect four monsters to hunt down...  Sounds simple enough.

I returned to the Dungeon of Montor, intending this time to find and kill a Carrion Creeper.  I decided to load up on spells along the way.  There are eleven spells in the game, but I haven't done much experimenting with them at the moment.  Four of them I wasn't able to buy: Destroy, Create, Blink, and Kill; those are restricted to Wizard characters.  (This pretty much guarantees that I'm going to play this game as a Wizard when it comes up again in my regular chronology.)  I bought ten each of the remaining spells, but the only one I've got much use out of so far is Ladder Up.  Casting it creates a ladder that leads to the dungeon level above, or to the wilderness if you're on level 1; it's a handy quick escape if you get into trouble, or find yourself lost.  I gather that spells can fail on occasion, but I've already juiced my Wisdom and Intelligence scores up to the point that my spells always work.

Back in Montor, I made my way down to level 5, skipping through levels 3 and 4 quickly so that I could avoid having my armour dissolved.  I had a bit of mapping trouble this time.  As I noted above, the dungeon doors are sometimes replaced by coffins, chests or force fields, and before I realised this I got completely turned around and lost.  I actually had to use a bunch of Ladder Up spells to escape and get my bearings; the monsters on the deeper levels can do in excess of 100 points of damage per hit, which really adds up.  I haven't died in this game so far, and I plan to keep it that way, so I made a quick retreat from the dungeon before going back a little wiser in terms of my mapping skills.

Defeating a Carrion Creeper

Despite getting lost I had managed to kill a Carrion Creeper, so I flew my air-car east to the second continent to see the king of Castle Rondorlin.  He rewarded me with a green gem, and another hint: I would need to use a time machine to beat the game.  I knew this already from hints acquired while drinking at the pub, but there's a good chance that a player might get this clue first.

Being rewarded with a green gem.

I guess I'm about halfway done with the game: I have two more dungeon quests to complete, and two more continents to explore, which I expect will take up the bulk of my remaining time with the game.  I'm still enjoying it, although the sluggishness of the dungeon loading is starting to wear on me.  I came into this game determined to map every square inch of it, but I'm wavering in that goal where the dungeons are concerned; there are an awful lot of them, I don't know how deep they go, and I don't even know if they're randomly generated or the same from game to game.  If anyone is aware of how Ultima's dungeons are generated I'd appreciate them letting me know, because I'd rather not expend any effort on further pointless mapping.

Before I finish up, I wanted to mention that I accidentally found the game's "attract mode", or demo, or whatever you want to call it.  Ultima uses two disks, one of which has the game and other of which has the information for your character.  If you boot from the second disk it launches the demo, which runs through a quick game intro showing off its various modes. I was hoping this might have given some extra backstory, but it doesn't.  It does have this radical skull, though.

This would make a great tattoo.

I suspect that this screen is used when a character dies, but because I'm so frikkin awesome at Ultima I haven't seen it yet.  I think I'll be able to keep it that way unless the monsters on the deeper dungeon levels get really tough, or I screw up when I go to space.  A "no deaths" run would make me feel pretty good though.

Monday, October 12, 2020

Ultima: Knowledge, Lasers, and Alcohol-Related Disasters

At the end of my last post on Ultima, I'd just finished exploring the first continent.  I'd been tasked by Lord British with finding the Tower of Knowledge, and my plan was to continue exploring the wilderness in the hope that I'd stumble across it.  I didn't have to wait long; I struck out east from my starting location and found the Tower of Knowledge on an island north-east of the continent.  I entered the tower, and was given a bonus to my Intelligence.  (Entering the tower also gives you the message "turris scientia magnopere", which is pretty much latin for tower of knowledge.)

Completing my quest for the Tower of Knowledge.

With my quest somewhat abruptly completed, I made my way back to Lord British's castle.  Rather than sail all the way around I decided to land on the east coast at the City of Grey and travel overland.  Along the way I stopped in Paws, and being flush with gold I bought a cart to travel in.  After some experimentation, I figured out the differences between walking on foot, using a horse, and using the cart.  Walking uses 1 unit of food per two steps, riding a horse uses slightly less than that (sometimes it takes 2 steps per unit of food, and sometimes 3), and the cart uses a unit of food per 3 steps.  So the cart is the most efficient method of overland travel.

From Paws I went to see Lord British, and he rewarded me for completing the quest with a +5 bonus to Strength.  I spoke to him again, hoping for another quest, and was told once again to seek out the Tower of Knowledge.  So I went back to the tower, got another Intelligence bonus, and returned to Lord British. He awarded me with more Strength, and once again tasked me with finding the Tower of Knowledge.  Is this really all that Lord British does in this game?  Grant you some strength bonuses for a pretty simple quest?  It's a far cry from his future role as the series' central NPC; here he's just one of many kings, and perhaps not even the most important of them.

Lord British's sole contribution to the
fall of Mondain.


I had plenty of money, so I decided to test out what would happen if I offered Lord British some gold. As I suspected, he rewarded me with an increase in hit points.  I gave him 90 gold (the most possible), and got back 135 hit points in return.  After a few rounds of this I had over 600 hit points, which I decided was plenty to continue my wilderness exploration.

Before heading off across the ocean though, I stopped in at Paws again and went to the pub.  I wanted to get some more rumours, but the first one I got was hardly helpful: "Bub, you best know this is a great game!"  Yes Richard, we know.  The second clue I got, after a few more drinks, was much more enlightening:

"Bub, you best know that over 1000 years ago, Mondain the wizard created an evil gem. With this gem he is immortal and cannot be defeated. The quest of --Ultima-- is to traverse the lands in search of a time machine. Upon finding such a device, you should go back in time to the days before Mondain created the evil gem and destroy him before its creation. If you do this, you will save the universe and win the game!!!"

Bub, you best know that I can break the fourth wall.

It's a little weird to be getting this vital plot information from a bartender, and even weirder for said bartender to completely break kayfabe by talking about "winning the game".  And unless there's a piece of documentation I've missed, this is the only place where Ultima tells you about its plot.  Despite being the big bad guy of the first game, Mondain seems to be a bit of a non-factor in the present day.  None of the kings mention him.  I guess all of the monsters infesting the countryside and the dungeons work for him, but Mondain himself is nowhere to be seen. It would be cool if you could find him in the present day and fight against him in his invincible form.

I also wonder how this fits with the plot of Akalabeth, where Mondain is said to have already been defeated by Lord British.  Did British drive Mondain away at some point, before Mondain made a comeback?  Or is Akalabeth technically set between Ultima I and II?

Now with an actual motivation, I returned to my frigate and set off across the ocean to the east.  It only took me about 30 "steps" until I found land, a small island with another landmark.  This was the Pillar of the Argonauts, and when I entered I was reward with... a dagger?  Hardly the most useful of treasures, but I kept it anyway.

A little further east I came to the coast, and started exploring in an anti-clockwise direction, stopping at cities and dungeons when I found them.  To the south-west of the continent I found an island with another landmark, the Pillar of Ozymandias.  Entering this gave me a quote from the poem by Percy Bysshe Shelley, as well as a bonus to my Wisdom score.

The cities I found on the second continent were named as follows:

  • Owen, in a forest grove near the west coast
  • The City of the Snake, in a bay to the south-west
  • Linda, on the south coast
  • Wolf, on a south-east peninsula
  • John, in a bay near the east coast
  • Arnold, on an island near the middle of the continent
  • Gerry, on the east coast of the north-western region
  • Helen, on the west coast of the large north-eastern island

Aside from the cities of the Snake and the Wolf, I suspect that Garriott was namechecking friends and family here, or possibly people who helped him work on the game.  I know that the code for the overland tile graphics was done by Ken Arnold, which accounts for one of the city names.  His parents were named Owen and Helen, which accounts for two more.  I'm sure Garriott scholars can fill me in on the rest.

I also found the following dungeons:

  • The Labyrinth, near the west coast
  • Where Hercules Died, south-east of the above
  • The Horror of the Harpies (there are two dungeons with this name, one south-east of Where Hercules Died, and the other on the large north-eastern island)
  • The Gorgon's Hole, on the south coast
  • The Dead Warrior's Fight, at the tip of a peninsula on the east coast
  • Advari's Hole, on an island near the middle of the continent
  • The Savage Place, on the maze-like island to the north
  • Scorpian Hole, to the north-west

I also found two castles, the Castle Barataria (on the central island) and the Castle Rondorlin (on the mainland north-west of that).  The king of Castle Barataria tasked me with finding the Pillar of Ozymandias; easily done, since I already knew where it was.  The king of Castle Rondorlin wanted me to find and kill a Carrion Creeper.

At this point I'd pretty much fully explored the continent.  Here are the two continents side-by-side.

Two remarkably similar continents.

Notice anything?  If you turn the second continent on its side and flip it, it's exactly the same layout as the first, with some ocean thrown in to mix it up a bit.  Even the cities, dungeons, castles and landmarks are found in the same places.  I wonder if this was done due to laziness or expedience, or if it was a clever way of getting around memory limitations?  I know there are books out there that go into the creation of the series, I really need to get my hands on one.

After visiting Castle Barataria, I went to the city of Arnold right next door, and discovered that some new methods of transport were available: an air-car and a shuttle.  I was definitely not feeling ready for space travel yet, so I didn't buy the shuttle; I wanted to hold off until I'd fully explored the world I was on.  I was more than ready to buy an air-car, though, and it was every bit as great as I'd been hoping.  Not only was it capable of skimming across the ocean, but it could also go on land; its only restriction was an inability to fly over mountains and forests.  It also had lasers, which were more powerful than my frigate's cannons.  I abandoned my frigate, and set off in my new air-car, with an icon that looked suspiciously like Luke Skywalker's X-34 landspeeder from Star Wars.

Using a Star Wars vehicle to shoot lasers at a Scottish cryptid.
This game is bananas.

It's a shame that the documentation of Ultima is so open about the game's space travel elements.  It's one of the biggest sections of the manual, and there's a space shuttle right there on the front cover.  Otherwise, there's no mention of the various technological weapons and modes of transportation that are eventually introduced.  I mean, the mash-up of elements in this game is still buck-wild, but I feel like they would have been even more effective if they weren't signposted so heavily.  I guess Garriott had to put the space ship control instructions somewhere though, and at this stage of video game development it wasn't going to be in an in-game tutorial.

I hit up the Pillars of Ozymandias to complete the quest I'd just been given, and along the way I also checked out the Pillars of the Argonauts again.  This time I was rewarded with a mace, a slightly better weapon than the dagger I'd been given last time.  Castle Rondorlin is very close to the Pillars of the Argonauts, so I decided to test a theory, shuttling back and forth between the two to see what I would get.  Sure enough, every time I visited the Pillats of the Argonauts I was rewarded with a stronger weapon, from regular stuff like swords and axes, to magical items like wands and amulets, to sci-fi stuff like light swords, phazors and blasters.  Eventually I had acquired a full complement of weapons, and when I wasn't shooting my enemies with the lasers on my air-car I was firing at them with my blaster.

Every weapon in the game.

There were a few weapons I couldn't use, though.  The wand, staff, and amulet had no effect; either I need to be a different class, or they're used to cast spells somehow.  The triangle, said in the manual to be a type of magic sword, also didn't work.  Not sure what's going on there, unless it's also restricted by class.

After that I went to a town to check out what armour was available, and was happy to see that Vacuum Suits and Reflect Suits were on sale.  I bought one of each, and equipped the Reflect Suit.

Having just cheesed my way into the best weapons in the game, I decided to do the same with my stats.  I started with the Pillars of Ozymandias, going back and forth between there and the City of the Snake until I got my score to 90.  The higher your score is, the lower the bonus you receive; by the time my score was in the 80s I was only getting 1 point per visit.  The manual says that the maximum attribute score is 99, but once I got to 90 I the bonus I was getting per visit was +0.  It's possible that multiple visits might be required at this point to raise a score by 1, but I was satisfied for the moment.

I then returned to the first continent, and did the same thing at the Pillars of Protection and the Tower of Knowledge, raising my Agility and Intelligence respectively.  This time I tried alternating between the two landmarks rather than visiting cities in between, and that worked; it also made the process quite a bit faster.  Three of my six attributes were at the maximum possible score (or near-maximum, if 99 is possible).

I was getting towards the end of my session, but I thought I'd stop back in at Paws to get some more pub rumours.  The first one I got was either a question or a warning: "Bub, you best know to watch the wench?"  I tried a few more times, until I finally found out the hard way the consequences for drinking too much: I was seduced by the wench, who stole all of my gold.

Is the the first CRPG where you can sleep with a prostitute?

This was a potentially fatal disaster.  I only had about 100 units of food, and nothing to buy more with.  It was a bit late at night for me to want to go grinding for gold in a dungeon, so I succumbed to the lure that every Ultima player eventually falls foul of.  It was time for a bit of theft and murder.

I went to the food store to try the (S)teal command.  It only worked when I was behind the counter, which is to say that it didn't work, and I was caught red-handed.  A couple of the guards gave chase, but with my new weapons and armour I took care of them.  Then I murdered the shopkeep, and made a few dozen attempts to steal some food.  None of them were successful, so figured that this was a bust.  It was time to try something else.

In my last post, I'd heard the pub rumour that the princess would offer a great reward to anyone who rescued her.  There's a captive princess in every castle, and a jester who wanders around singing about their possession of the key; to pull this off, I'd have to get the key from the jester, open the princess's cell, and escape from the castle without getting killed by the guards.

I was wary of taking on so may guards though, so I did a test run, fighting the guard at the entrance to the Castle of Lord British.  I killed him, but it cost me far too many hit points; there was no way I'd survive if I tried to fight my way out.  Instead, I decided to make a mad dash for it.  At first I tried the steal command near the jester, but that didn't work.  There was nothing else to do but murder the poor soul, and take the key.  Then I high-tailed it to the cell with guards in pursuit, and let the princess out.  She followed me as I raced out of the castle, soaking up hits as the guards attacked me while I fled.  Thankfully the guards weren't all that good at boxing me in, and I had more than enough hit points to make it out.

Making a mad dash for freedom.

Upon escaping from the castle, the princess rewarded me with 3,000 gold, experience, and hit points.  These were exactly what I needed to get out of my cash-strapped predicament, and a potential death by starvation.  The rumour I'd been told had suggested that I'd get an extra reward if I was 8th level or higher.  I'd already reached 9th level by that point, but I didn't get anything extra.  I remember that the princess is the one who gives you the time machine, and I thought that's what would happen here.  It didn't, and now I suspect that there are other things I need to do first.

My sweet, life-saving reward.

All told that was a pretty fruitful session, with the aim of the game revealed, one continent fully explored, three of my stats maxed out, the best weapons and armour obtained, and a princess rescued.  I almost came to disaster near the end, but those are the moments that make success all the sweeter.  Next time around, I think I'll do some dungeon exploration, I have quests to kill a Gelatinous Cube and a Carrion Creeper, and it's about time I got to it.

Saturday, October 10, 2020

Priority CRPG 3: Ultima (1981)

The original cover of Ultima,
painted by Dennis Loubet


It's time to return to the Priority List, for the beginning of what may very well be my all-time favourite CRPG series.  It's been a long time since I played through the first Ultima.  The first time was around the year 2000, when a friend of mine bought the compilation of all nine games.  I think I played it one more time after that, around the time I got married in 2007.  Both of those times, I played the DOS port, which I gather made quite a number of changes from the original.  This time, I'm going right back to the source, and playing the Apple II version.  I'm very interested to see how it differs from the game I remember.

The last time I checked in with Richard Garriott, he'd just released Akalabeth, his first commercial game. It made quite a decent whack of money, which was obviously encouraging for a 19-year-old who was still taking classes at the University of Texas.  Fresh off of that success, he launched right into developing his next game, originally to be titled Ultimatum, but shortened to Ultima due to a name conflict with an existing tabletop wargame.

In a lot of ways, Ultima is a rehash of Akalabeth.  It uses the same basic engine for dungeon exploration, with the same wireframe graphics.  It has a top-down view for exploring the wilderness, albeit one that's had a huge graphical and technical overhaul.  The major difference that came with Ultima was its scope: an enormous overworld to explore, castles and cities that are represented graphically rather than as menus, and even a section in outer space (I'll get to that in a later post, I'm sure).  About the only things that are smaller in Ultima are the dungeons, which are no longer infinite in depth as they were in Akalabeth.

The Ultima series is renowned for the way in which it brought greater depths of storytelling and world-building to the CRPG genre, so it's surprising to see that none of that is evident in the manual or the game intro.  Even Akalabeth had its backstory in the manual, but with Ultima a player from 1981 would have been completely in the dark.  I remember what the story of the game is, of course, but I'll refrain from describing it here just yet.  I'm interested to see when that story is made clear, and I feel as though I'm more likely to pay attention to that if I haven't already laid it out for the blog.

Yep, that's a space shuttle alright.

The manual is just ten pages, and focuses mostly on gameplay elements.  It goes through character creation, a very brief segment on monsters, weapons, and the interfaces for dungeon, city, wilderness and space exploration.  There's also a reference card, which details all of the keyboard commands required for the game.  On the reverse it shows the benefits of the various races and classes, as well as the names and effects of every spell.

ZTATS!

It's interesting to note what's not in the documentation.  The backstory for one, though I mentioned that already.  There's nothing said about how you advance your character, which seems like a pretty important omission.  The player is left in the dark on a lot of gameplay elements, with trial-and-error being pretty much the only way to learn.  There's also no world map, which feels very odd.  The map seems to me like a vital part of Ultima, and starting without one feels very much like being thrown in the deep end.

The title screen presents the game's name with an image of a rampant lion that's quite skillfully drawn for the time (although I have to be careful when making comparisons now, because I'm a couple of years ahead of my regular chronology). It's not as impressive an intro as the sequence at the start of Akalabeth, but this is a much bigger game, and I suspect there was less room on the disk to play around with that sort of thing.

Is that a tiny sailboat behind the lion?

This is followed by a menu that asks whether you want to create a new character or continue your game.  You only get one character and one saved game in Ultima, but I've never found that to be a problem in Garriott's early work; it's hard to get into an unwinnable scenario in the first few Ultima games.  By Ultima VI things start to get more complicated, and having just one saved game would be awful, but here it shouldn't be a problem.

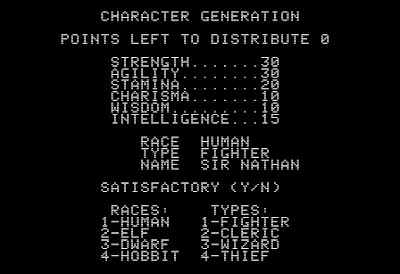
From there, it goes straight into character creation.  Characters in Ultima have six attributes: Strength (which influences damage dealt in combat), Agility (which affects the ability to land a blow), Stamina (which affects your hit points, and how well you hold your liquor), Charisma (for haggling), Wisdom (for spell-casting) and Intelligence (for spell-casting and haggling both).  You have 90 points to distribute between these attributes, but every score must be between 10 and 20.  I gave myself a 20 in Strength, Dexterity and Stamina, and a 10 in the remaining three scores.  You also begin with 100 hit points.

I earned that knighthood when I completed Akalabeth.

After assigning your attributes, you have to pick a race and a class.  The races available are Human, Dwarf, Elf and Hobbit (just as in early Dungeons & Dragons).  Humans get a bonus to Intelligence, elves get an Agility bonus, dwarves get a bonus to Strength, and hobbits get a bonus to Wisdom and a penalty on Strength.  As far as I can tell, your race doesn't otherwise affect the game.  I chose to be a human, because later games in the Ultima series are based on the idea that you're playing as yourself.  I'm a human, so I'm playing as a human.

There are four classes to choose from: fighter, cleric, wizard and thief.  Fighters get a bonus to Strength and Agility. Clerics get a bonus to Wisdom, and certain spells will always work for them.  Wizards get twice as many spells, as well as an Intelligence bonus. (I'm not sure what this means in the context of the game, as you have to buy each single use of a spell. Do they get a two-for-one deal?)  Thieves get an Agility bonus, as well as being better at stealing and unlocking things.  I chose to be a fighter, which is probably the most boring option.  I'll choose a different class if I ever revisit this game for the blog.

I started playing, and found myself in an open grassy field, with absolutely no guidance as to what to do next.  I was armed with a dagger, and had 99 units of food and 100 gold pieces.  There was little else for me to do except strike off in a random direction, and I decided to go south.  Movement in the Apple version of Ultima is tricky, because the Apple II keyboard didn't have up and down arrow keys.  Up/north is mapped to Enter, and down/south is mapped to the "/" key.  It took some getting used to.  I suppose I could remap the keys, but I'd like to keep the experience as authentic as possible.  Besides, I'm accustomed to it now.

The quest begins with some aimless drifitng.

To the south I found a mountain range, with what looked like a dungeon entrance.  I didn't feel quite up to exploring dungeons just yet, so I headed west hoping to find a place where I could buy some equipment.  It wasn't long before I found the lakeside town of Fawn.

Towns in Ultima have their own screen, although each town uses the exact same layout.  There are six stores in every town: Food, Arms, Armour, Transport, Magic, and the Pub.  There are also a number of characters wandering about, although you can only really interact with the shopkeepers (using the (T)ransact command).  Most of the others are guards, and the one in the pub is a wench, according to the manual.  Most notable is Iolo the Bard, who will go on to become one of the most important characters in the whole series.  Here, he simply wanders around, occasionally singing "Oh eyoh he hum!"  I've never figured out what it means, and as far as I can tell nobody else has either.

Exploring Fawn

My first stop was the food store, more properly known as Little Karelia's Finnish Grocery.  They were selling food in packs of 10 for 5 gold pieces.  I bought nine packs (45 units of food).  This is the most you can buy in one transaction, because the prompt only accepts a single number.  You consume food every few steps in the wilderness (and at a lesser rate when in cities and dungeons).  If your food ever drops to zero, you instantly die.  I remember having all sorts of food-related problems in the early Ultimas when I first played them, but this time around I've been able to manage it well.

From there I went to check out the weapon shop (Naughty Nomaan's).  All they had for sale were maces, and ropes with spikes.  I bought a mace for 8 gold, and readied it instead of my dagger.  Then I checked out the armour shop (the Armour Shop of Lord Eldric D'Charbonneux), where I bought some leather armour.  The manual says that the types of weapons and armour available to buy will change as time advances in the game.  It didn't have a list of what would appear, but it did make special mention of a weapon called a "triangle", a type of magical sword.

My gold had just about run out, but I did the rounds of the other stores anyway.  Super Duper New and Used Transport had horses, carts, rafts and frigates for sale, but all of those were well out of my price range.  The spells at Chad the Mad's Magic Shoppe were also too expensive; I'll discuss how magic works in a later post.  My final stop was the pub, where I bought a few drinks for 1 gold each.  On the third drink the barkeep, Varg, gave me the following hint: "Bub, you best know that the princess will give great reward to the one who saves her, and an extra gift if the player is 8th level or greater!"  So, I finally had some guidance: if I find a princess, I should try to rescue her.  I was also given some incentive to grind beyond general power gain, as I was keen to find out about this special gift.

Thinking about the towns, I was wondering just why Garriott felt the need to switch from a menu system.  After all, there's not much to do in them except visit the shops, so using a menu would be a lot more user-friendly.  Then I remembered the (S)teal command, which lets you try to rob the various stores.  This can set the guards after you in a frantic chase, which only works because of the change to  a top-down interface.  Robbing the stores is tempting, but at this point I don't think I'm strong enough to take on the guards.

Now that I had a better weapon and some armour, I headed back east to try my luck in the dungeon I'd spotted before.  As I neared the entrance I had my first combat, as I was attacked by some "wandering warlocks".  Unlike in later Ultimas, you can't see the enemies approaching; they simply appear in the square next to you when they attack.  Combat is a simple matter of using the (A)ttack command, and alternating blows with the enemy until one of you is dead.  All of the game's other commands are still available in combat, so other tactics - such as running away - are also possible.  I had no trouble with this battle, and after about five hours of playing I've yet to be in much danger.  Even when you have poor equipment and not many hit points, the enemies in Ultima aren't all that hard to kill.

Battling multiple warlocks.

Enemies often attack in groups, up to four at a time.  When you fight multiple foes, each one gets an attack on the enemy's turn, but even against four foes at once I haven't been all that troubled.  I could be misremembering, but I'm sure that the DOS port only ever had you face one foe at a time.

I entered the dungeon, which was titled "the Mines of Mt. Drash" (a name which would later be applied to the Ultima spinoff Escape from Mt. Drash).  As I mentioned above, it uses the same first-person perspective and wire-frame graphics as Akalabeth.  The engine has been improved in some ways, and worsened in others.  The big improvement is that the number generation is a lot more random; the results of your actions aren't as predetermined and easy to predict as they were in the previous game. It also seems as though more monsters spawn in the dungeon levels.  Akalabeth generally only had a few per level, and when they were all killed that level was empty.  I explored the first level of the Mines of Mt. Drash for a while, and never ran out of enemies to fight.  What's gotten worse is the speed; it takes forever for the game to draw the walls, and it redraws with every single command you type.  What makes it even worse is that you can't crank up the speed on the emulator; if you wait around the game will pass a turn after a few seconds, and that time gets even shorter at higher emulation speeds.  Passing turns can leave you open to attack, not to mention wasting food, so I've been playing at authentic Apple II speed.  I might crank it up once my character has gotten stronger, but for the moment it's too risky.

Giant rats are the toughest dungeon enemies I've fought so far.

After poking around for a while, fighting skeletons, thieves, evil rangers and giant rats, I decided to head back to the surface.  My hit points were getting low, and I wanted to try to find some healing.  I was surprised upon leaving the dungeon to be rewarded with about 120 hit points.  I'd forgotten about this, but gaining hit points in Ultima is done by fighting monsters in the dungeons.  When you return to the surface, you gain hit points equal to twice the value of the experience points you gained for killing monsters.  I was reminded of a line I read somewhere (I think it might have been at The CRPG Addict) that said that Ultima is the only game where you go and find a dungeon when you're low on hit points.

Making gains.

On my way to the Mines of Mt. Drash I'd spotted the town of Montor to the south-east, so I swung through there to buy some more food.  From there I followed the coastline to the west, and found another dungeon at the end of a peninsula: Death's Awakening.  In this dungeon I was reintroduced to a nasty surprise carried over from Akalabeth: pit traps that drop you to a lower dungeon level.  Luckily I'd already found the location of the stairs, so I was able to quickly make it back up to safety.  These pit traps can be avoided if you're carrying a rope and spikes, but each set of rope and spikes is only good for one use, so it's a good idea to stock up.

I had some money to spend once I left the dungeon, so I returned to Montor and bought a horse and some plate mail armour (the best type currently available).  Swords and axes were now available at the weapon store, so I bought a sword as well.  The sword didn't seem to increase my damage all that greatly, but the plate mail had a definite effect on how often I was being hit.  As for the horse, I think its main effect is to decrease the amount of food you eat when travelling overland.

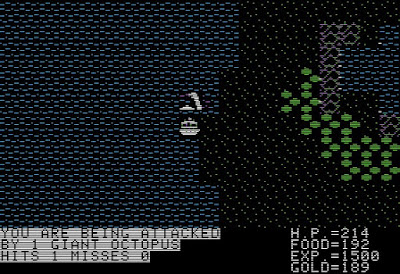
I continued around the coast, fighting monsters and dipping into the first levels of dungeons as I went.  By the time I reached the town of Grey on the east coast I had over 600 gold pieces, so I splashed out and bought a frigate.  My mind was awash with memories of sailing around the coast and blasting monsters with impunity, but I was probably getting mixed up with Ultima II (or perhaps this game's DOS port).  Monsters don't appear from far away in this game, so there's no way to attack anything on land with your cannons.  Instead, the cannons are simply (F)ired in lieu of the (A)ttack command when you're attacked at sea.  The oceans are infested with various kinds of sea monsters; they have lots of hit points, but the frigate's cannons do lots of damage, so it all balances out.

There are a lot of frigate puns I could make, but I won't.

Using my frigate, I decided to explore around the coast in a clockwise direction.  I'm not sure why, as I was covering a lot of territory I'd already explored, but it just felt like the natural direction to go.  I continued checking out dungeons and towns when I found them, but what I was really looking out for was a castle.  I eventually found one on the north coast of a large bay: the Castle of the Lost King.

Castles in Ultima have their own screen, and just like towns all castles use the same layout.  Most of the inhabitants are guards, but there's also Gwino the Jester, and a prisoner in a cell to the south-east.  Gwino occasionally exclaims "I have the key!", which will become very important later in the game.  I won't get into it just yet, but needless to say at some point I'll need to get that key from Gwino so that I can unlock the cell.  (Gwino is probably the same character as Gwenno, who in later games is married to the bard Iolo.  For many reasons which will later become apparent, I prefer to believe that this is not the case.)

Talking to the Lost King.

The castle has storerooms for weapons, armour and food, which I'm pretty sure you can steal from.  I didn't want to take my chances with the guards just yet, so I went to talk to the king.  I was asked whether I wanted to offer him gold or service.  I chose service, and was tasked with killing a Gelatinous Cube.  Finally, I had a quest!  Choosing gold, if memory serves, increases your hit points, but I'm not sure because I haven't tried it out yet.

Further around the same bay I found another town, with a castle nearby: this was Britain, and the Castle of Lord British.  Lord British, of course, is Richard Garriott's nom-de-plume, and one of his counterparts in the game world.  (There are a number of game designers who have a version of themselves in their game, but how many have more than one?)  I'd already met Lord British during Akalabeth, where I'd killed a bunch of monsters for him and been knighted.  He gave no indication that he recognised me though.  Upon offering him my service, he told me to find the Tower of Knowledge.

I spent the rest of the game session exploring and mapping the continent.  Aside from the aforementioned towns of Fawn, Montor, Grey and Britain, I also found the following towns:

  • Tune, in the south-east
  • Moon, along the east coast
  • Yew, near a large forest to the west.  This town will return in later Ultimas, still surrounded by forest.
  • Paws, north-east of the Castle of Lord British.  This town will also return later, not far from Britain.

I also found the following nine dungeons:

  • The Mines of Mt. Drash. There are actually two dungeons with this name.  I'm not sure if this is a mistake.
  • Death's Awakening, near Montor
  • The Dungeon of Doubt, south-west of Moon
  • The Dungeon of Montor, in a north-eastern mountain range nowhere near the town of Montor
  • The Unholy Hole, close to the north coast
  • The Lost Caverns, in a mountainous maze to the west
  • Mondain's Gate to Hell, on an island in the middle of the large bay
  • The Dungeons of Perinia, to the north-west

That is a lot of dungeons, and I'm pretty sure that I've only explored one of multiple continents.  It really does highlight just how vast this game is in comparison to its contemporaries.

While exploring I came across an island off the continent's north coast, with a landmark represented by a signpost icon.  When I entered the area the landmark was titled "the Pillars of Protection", and visiting it increased my Agility by 6 points.  It only worked once, but I'm wondering if there's some way I can get it to work again.  Perhaps it will reactivate when I start a new game, or after a certain number of turns?  I have no idea.

This is what I've mapped of the wilderness so far:

The starting continent, fully mapped.

Somewhat annoyingly, if I'd just gone north at the beginning I would have found the Castle of Lord British right away.  I like to visit him as early as possible in any Ultima game.

Towards the end of my last session I had a wilderness encounter with an unusual enemy: hidden archers.  They attacked me in a forest, but every time I tried to attack them I was told that I was "out of range".  I tried to flee, but the archers blocked every direction I tried to move.  I was starting to worry that they'd whittle my health down to nothing, but eventually they disappeared when I tried to move into their square a few times.  This is the only monster I've encountered with anything approaching a special ability.

I hate these guys.

To end the session, I went to the pub in Paws and downed a bunch of drinks.  I didn't suffer any negative effects (probably due to my high Stamina), but I did manage to gather a few more clues.

  • Bub, you best know that you should go back in time!
  • Bub, you best know about space travel! And that you must destroy at least 20 enemy vessels to become an ace!
  • Bub, you best know that many if not most lakes and ponds have strong magical powers!

I can remember what the first two clues are getting at, but I have no idea what the deal is with lakes and ponds.  I tried messing about with the ponds in Lord British's castle, but none of the commands I used accomplished anything.

I ended my session with a 2nd level character, and a few leads.  It's tempting to start dungeon delving so that I can kill a Gelatinous Cube for the Lost King, but I've been having more fun exploring and mapping the wilderness.  So I'll probably focus on that, which will also allow me to search out the Tower of Knowledge for Lord British.

I've had a great time revisiting Ultima.  It's undeniably primitive by modern standards, but after playing most of the CRPGs that came before it, it's a revelation.  Nothing before Ultima had its level of scope and freedom; it really does feel like a game where you can explore an entire world.  More than anything else I've played on the blog so far, this feels like a fully formed CRPG.